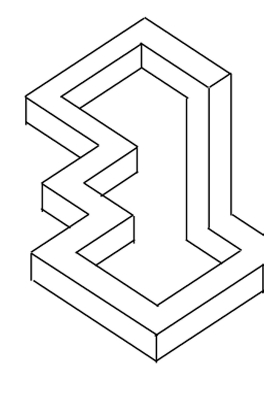
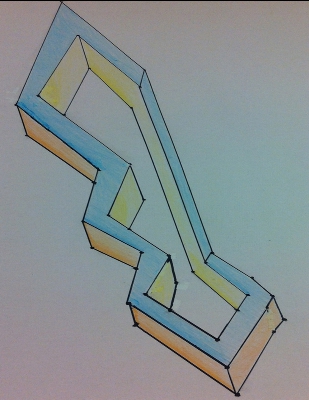
Visualizing 3-D Objects In Different Perspectives
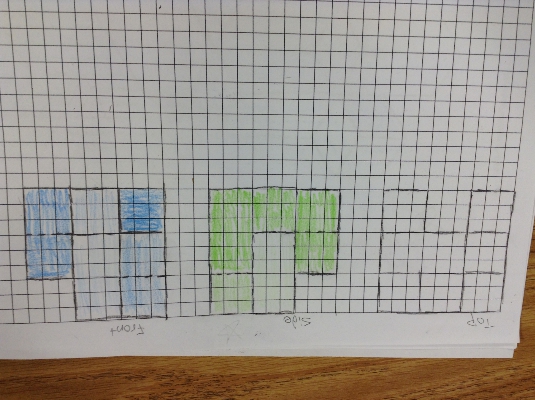
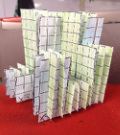
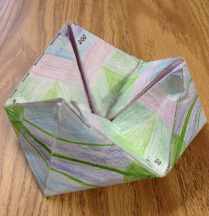
Below are examples of the steps it took to create a slice form. The final version is on the right.
|
|
|
|
|
|
|
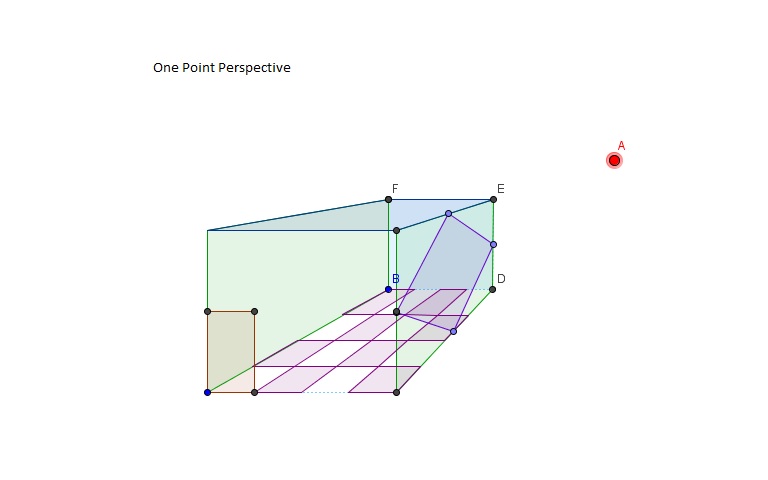
One Point Perspective Two Point Perspective
Anamorphic 3-D Drawing Project
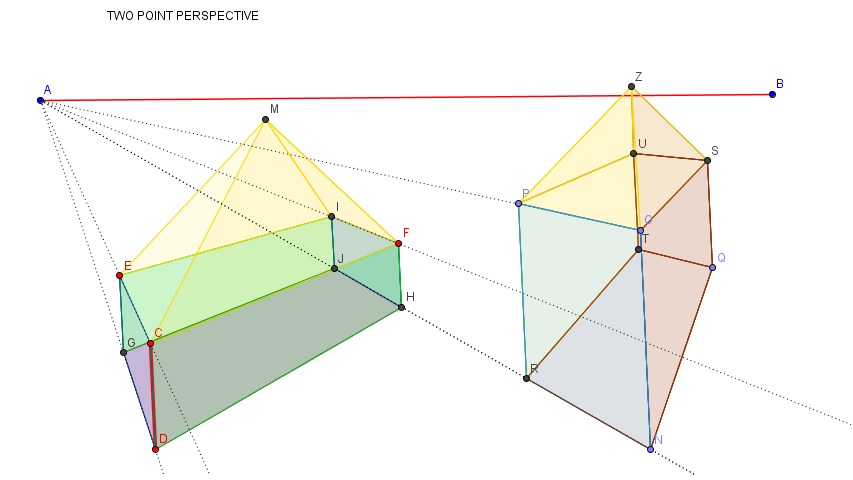
Anamorphic art is a piece of 3-D work that appears distorted except when seen at one specific angle. Anamorphic drawings are a result of “projection” because in order to achieve a piece of work where the original picture is only seen at one point, we projected the original image onto poster-board and stayed in one exact spot while mapping out the picture in order for the picture to be clear at only one sole point. To accomplish this, we chose a 3-D image, traced it onto a glass picture frame, and securely propped up the frame so that at one chosen point the image was projected completely onto the poster-board (see picture). Then, one person stayed behind the frame and used a laser pointer to show the other partner where to plot key points in the image. This was by far the most tedious and stressful part for both partners because if you are behind the frame, if you move even a tiny bit, your points get messed up and the picture will end up distorted no matter how you look at it. If you were plotting points, you had to make sure you plotted it exactly where the other person pointed to or, again, the picture would end up distorted. Going into this project, I didn’t expect this to be as difficult as it was, particularly when you stayed behind the frame and pointed to where points should go. To overcome the challenge, we made sure my head could be stabilized so that I didn’t have to rely on my neck muscles for the entirety of this project. Overall, the tediousness of this project was a great way for us to learn the importance of patience, and that the old saying, “good things come to those who wait” is indeed true.
|
|
Above is the original 3-D image used. Above is the final product in the distorted view.
Angle of Elevation

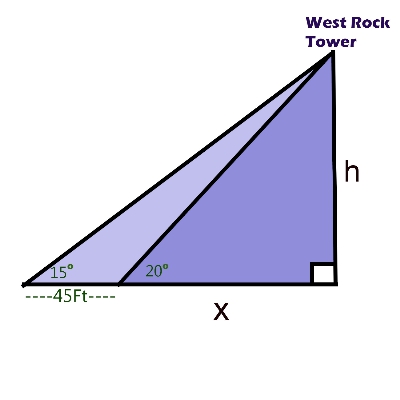
West Rock Tower
Tan20=h/x Tan15=h/(x+45) X is the distance the angle of elevation was measured from to the object.
h= xTan20 h=Tan15(x+45) H is the height of the object
xTan20=Tan 15(x+45)
Distribute
xTan20=xTan15+ 45Tan15
Subtract ‘x’Tan15 to get ‘x’ on the same side
XTan20- xTan15=45Tan15
UN-distribute
X(Tan20-Tan15)=45Tan15
Get ‘x’ by itself
X=(45Tan15)/(Tan20-Tan15)
X=125.57366ft
Plug x into first equation to solve for h.
H= xTan20
H=45.705…
Since the person measuring the angle had an eye height of 5ft, that amount was added to the height listed above.
H=50.705ft

South Tree
Tan20=h/x Tan15=h/(x+75) X is the distance the angle of elevation was measured from to the object.
h= xTan20 h=Tan15(x+75) H is the height of the object
xTan20=Tan 15(x+75)
Distribute
xTan20=xTan15+ 75Tan15
Subtract ‘x’Tan15 to get ‘x’ on the same side
XTan20- xTan15=75Tan15
UN-distribute
X (Tan20-Tan15)=75Tan15
Get ‘x’ by itself
X=(75Tan15)/(Tan20-Tan15)
X= 209.289…ft
Plug x into first equation to solve for h.
H= xTan20
H=76.175…
Since the person measuring the angle had an eye height of 5 ft, that amount was added to the height listed above.
H=81.175…ft

East Telephone Pole
Tan13=h/x Tan7=h/(x+115) X is the distance the angle of elevation was measured from to the object.
h= xTan13 h=Tan7(x+115) H is the height of the object
xTan13=Tan 7(x+115)
Distribute
xTan13=xTan7+ 115Tan7
Subtract ‘x’Tan15 to get ‘x’ on the same side
XTan13- xTan7=115Tan7
UN-distribute
X (Tan13-Tan7)=115Tan7
Get ‘x’ by itself
X=(115Tan7)/(Tan13-Tan7)
X= 130.641… ft
Plug x into first equation to solve for h.
H= xTan13
H= 30.161…
Since the person measuring the angle had an eye height of 5ft, that amount was added to the height listed above.
H= 35.161…ft
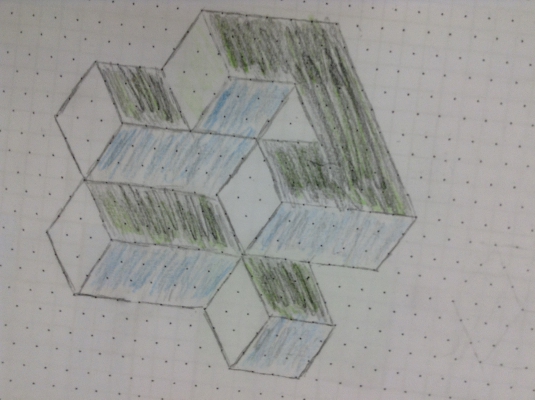
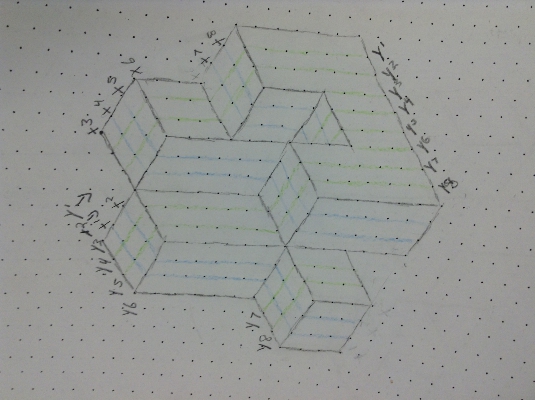
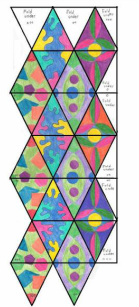
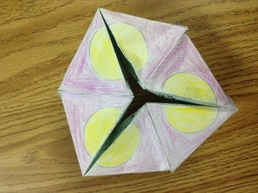
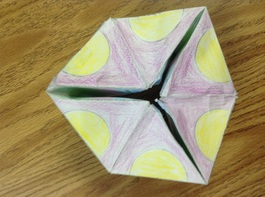
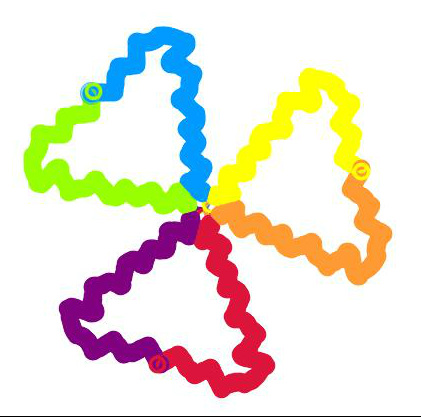
Hexaflexagon
A hexaflexagon is a 3-D rotational transformation compiled of tubular-linked tetrahedrons.
Coloring may seem like an easy, mindless act, but not when it comes to hexaflexagons. If you wish to create a rotational picture, you have to ensure that the way you color each triangle will work with the others and that each line of triangles creates a picture.
This activity allowed me to create my own art all the while learning the values of rotational symmetry.
|
|
|
|
I definitely enjoyed coloring the most throughout this project. The way I chose to color my hexaflexagon meant that, once put together, it would create a combined shape (as shown above). An added bonus was that if you turned the hexaflexagon the opposite way, it would create a completely different shape using the same triangles.
Now that I understand how all the triangles fit together and what gets reflected onto what to create a cohesive shape, I can better line up my shapes using rotational symmetry and make my hexaflexagon something I can enjoy.
Through this activity, I learned I really enjoy coloring. I like planning out what I'm going to color and love seeing it all put together. However, I also learned that there comes a point where all your creative juices dry up, and eventually, looking at colored pencils will make you want to break something.
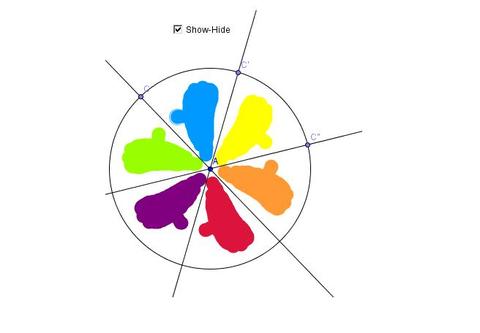
Snail-Trail Graffiti Geogebra Lab
This fun lab was created by using basic rotations and reflections to create a manipulative art piece.
Here's how it happens: Create a circle and divide it into six equal sections. Then add a single point in one of the sections in this case, the blue dot. Then reflect the blue dot into the next section and change it's color (green dot). Then reflect the green dot onto the next available section and so on. In the end, by only moving the blue dot, all the other dots mimic it's movement to create a rotational symmetry piece.
Through this lab, I learned that math is more than numbers and graphs. It can create more than a graph or a number. It can create art. I also learned that I highly prefer math art to traditional art.
|
|
Two Rivers Geogebra Lab
Problem: There is a sewage treatment plant at the point where two rivers meet. You want to build a house near the two rivers (upstream from the sewage plant, naturally), but you want the house to be at least 5 miles from the sewage plant. You visit each of the rivers to go fishing about the same number of times but being lazy, you want to minimize the amount of walking you do. You want the sum of the distances from your house to the two rivers to be minimal, that is, the smallest distance.
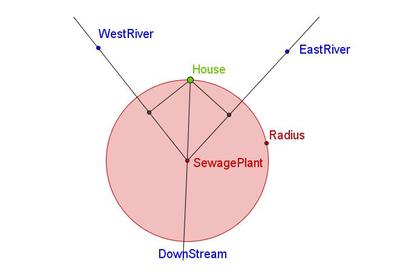
Chances are you think this is the correct answer. If that is the case, you would be incorrect. Yes, the house is placed equally between the two rivers and should therefore be the shortest distance to each river. This is not what the problem was about. The problem desired the shortest total distance to the two rivers.
|
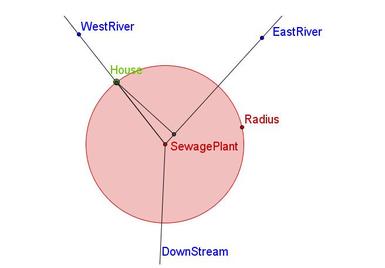
Despite what you might think, the image above is the correct answer because it amounts to the minimal distance traveled: the goal in this activity.
This was achieved by having the house along the radius of the sewage plant, on either river. |
This lab focused on practicing using the distance formula and finding the sum of a distance from a point to a line.
The Burning Tent Geogebra Lab
A camper out for a hike is returning to her campsite. The shortest distance between her and her campsite is along a straight line, but as she approaches her campsite, she sees that her tent is on fire! She must run to the river to fill her canteen, and then run to her tent to put out the fire. What is the shortest path she can take? Investigate the minimal two-part path that goes from a point to a line and then to another point.
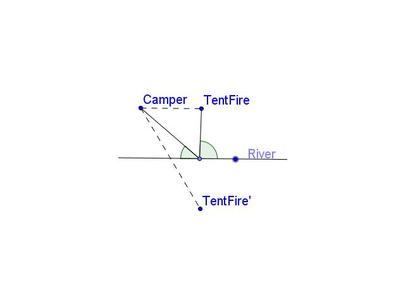
Shown above is an example that doesn't satisfy this problems requirements. Unlike the correct example on the right, a random point is selected along the river in between the tent and the camper. The angles are not equal and the distances from Camper to River and Tent Fire to River are not equal. When Tent Fire is reflected across the river, you can see that the point is not close to where the line from Camper to Tentfire' intersect on the river. The point of intersection is the spot at the river where minimal distance traveled is achieved.
|
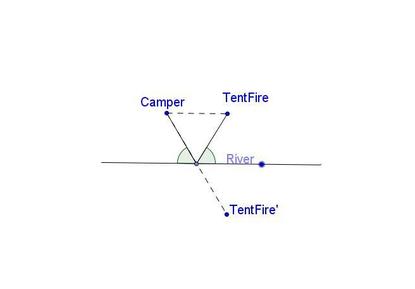
The River point should be located exactly in between the camper and tent fire for the minimal distance.
When Point Tent Fire is reflected over segment AB it creates a straight line from Camper to Tent Fire. The shortest distance is always a straight line. Since Tent Fire' is a reflection of Tent Fire, the point in between Camper and Tent Fire will result in the shortest distance. |
